You’ve got the gear. The ring light’s plugged in, your mic’s clipped on, and your tripod stands strong. So why do your TikToks still look…mid?
Production tools don’t automatically make your content look professional. It’s how you use them that makes the difference. You don’t need a fancy setup to make great videos — what you do need is to know how to optimize what you have so your content stands out without extra editing or expensive upgrades.
In this guide, we’re skipping the shopping list (because you already read that post, right?) and diving straight into how to use your tools to create high-quality, engaging TikToks. From perfecting lighting and sound to framing your shots like a pro, we’re covering everything that makes your production setup work for you, not against you.
Let’s ensure your next TikTok looks as good as your ideas.
Create a Setup That Works for You, Not Against You
Ever spent more time setting up your filming space than actually filming? Yeah, we’re not doing that anymore. A solid setup shouldn’t slow you down; it should make recording more straightforward, faster, and stress-free.
The key? Designing a TikTok-friendly space that’s equal parts aesthetic, functional, and ready to go at a moment’s notice.
Make it make sense: Permanent vs. temporary setups
Permanent setups: If you film regularly, a dedicated space is a game-changer. Keep your ring light, tripod, and backdrop in place so you only need to hit record. Perfect for daily creators who want consistency without the hassle.
Temporary setups: Not everyone has a spare corner to dedicate to TikTok. If you film in different locations (or don’t want a ring light permanently in your living room), invest in quick-setup gear — think collapsible backdrops, clip-on lights, and portable tripods.
The no-stress setup: time-saving tricks
Streamline your process to spend more time creating and less time getting frustrated finding everything you need.
- Create a grab-and-go filming station: Keep your essentials (ring light, mic, stand, charger) in one place so you’re not hunting for gear every time inspiration strikes.
- Mark your ideal filming spot: Use tape or a subtle marker on the floor to know exactly where to place your tripod for the best angle every time.
- Batch your filming: Knock out multiple videos at once so you don’t have to reset everything later.
Recording becomes effortless when your setup works with you instead of against you. No more wasting time fidgeting with lighting or framing — just hit record and let your content shine in a way that attracts viewers and potential advertisers.
Light It Up: Get That Flawless Glow Every Time
Great lighting makes the difference between looking like a pro and like you filmed in a cave. But it’s not just about brightness. It’s about positioning, color balance, and working with (not against) your light sources. Whether using natural light, ring lights, or a full softbox setup, ensure you always look crisp, clear, and camera-ready.
Ring light, softbox, or sunshine?
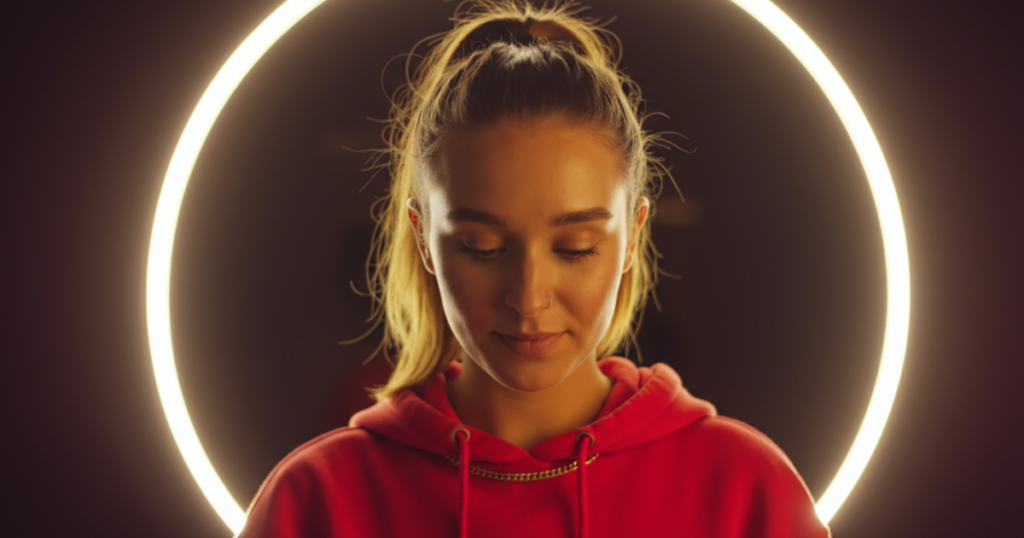
 Ring Lights: The go-to for most creators. Place it directly in front of you (slightly above eye level) for an even, flattering glow. Avoid putting it too close to your face unless you want to see every pore in 4K.
Softboxes and Panel Lights: These create softer, more natural lighting without harsh shadows. Best for beauty content, interviews, or a professional, studio-like effect.
Natural Light: The free MVP of lighting. Position yourself facing a window for soft, diffused brightness. If the light is too intense, a sheer curtain softens it.
The golden hour hack (why timing matters)
Golden hour (right after sunrise or before sunset) gives you that warm, dreamy glow that makes everyone look like a movie star. If you can time your filming around this, do it. Just ensure the light hits you from the front; side lighting can create unflattering shadows.
White balance: Why you’re orange or a ghost
Ever filmed a video and realized your skin tone looks way off? That’s your white balance settings messing with you.
Quick hacks to fix it:
- If your video looks too warm (orange/yellow tint) → Lower your white balance temperature.
- If it looks too cool (blue/pale tint) → Increase the temperature slightly for a more natural look.
For consistent results, turn off auto white balance and set it manually.
Fixing common lighting mistakes
More quick hacks to get things looking just right:
 Too harsh? Move your light further away or use a diffuser (a white sheet works in a pinch).Uneven shadows? Add a bounce light (a second light source or even a white poster board to reflect light back).Too dim? Adjust exposure settings on your phone before recording instead of cranking up brightness in post-editing.
Mastering your lighting isn’t just about looking good; it’s about creating a video people actually want to watch. Nail it, and your content instantly looks next level.

Now that your lighting is on point, let’s talk about stabilization because nothing screams  amateur like shaky, nausea-inducing footage. Whether you’re filming a tutorial, dance trend, or cinematic masterpiece, keeping your shots steady makes your content easier to watch and more engaging.
Let’s break down the best ways to stabilize your videos, from high-tech gimbals to DIY tricks that won’t cost a dime.
Tripods vs. handheld: When to use each
A tripod is your best friend for static shots, like talking-head videos, product showcases, or aesthetic time-lapses. If you don’t have one, you can improvise — stack books, lean your phone against a wall, or use a clip-on mount for desks and ring lights.
Handheld filming is great for vlogs, action shots, and dynamic content, but only if done right. If your footage looks like it got filmed on a rollercoaster, it’s time to level up your stabilization game.
Gimbal basics: How to set up for cinematic motion
A gimbal is like having a camera crew in your pocket. It immediately counteracts shaky movement, letting you glide smoothly through scenes like a pro.
To get the best results:Balance your phone before turning it on; if it’s off-center, the motor will struggle to stabilize it.Use slow, controlled movements instead of whipping your phone around.Try the “walk like a ninja” technique; bend your knees slightly, and move smoothly to minimize bounce.
How to keep shots steady without pro gear
Not ready to splurge on a gimbal? No worries, you can still get smooth footage with these DIY hacks: Tuck in your elbows: keeping your arms close to your body reduces natural hand shake. Use a strap or rubber band: wrapping it around your wrists gives extra support. Lean against a surface: walls, tables, or even your knee can act as makeshift tripods. Slow down your movements: fast, jerky motions = instant shaky cam.
Turning on built-in stabilization for smoother results
Your phone probably has a hidden stabilization feature, and it’s a game-changer:
 On iPhone, go to Settings > Camera > Record Video and enable Cinematic Stabilization or Enhanced Stabilization (if available).
On Android, check Camera Settings > Video Stabilization and turn it on. Some models even have a Super Steady Mode for extra-smooth results.
 Pro tip: Always do a test shot before filming even with stabilization. If it still looks shaky, tweak your settings or try a different holding technique.
Even a handheld video can look professionally shot with the right stabilization tricks. Keep it steady, and your content instantly feels more polished and watchable.
Sound Matters: How to Make Your Audio Crisp and Clear
Great visuals will pull people in, but bad audio will make them scroll away faster than a botched transition. Muffled voices, distracting echoes, and weirdly delayed sound can ruin even the most polished video. If you want high-quality, scroll-stopping content, it’s time to step up your audio game.
Mic positioning 101
If you’re using an external mic, positioning is everything. Get it right, and your voice will sound rich, clear, and professional.
 Clip-on lavalier mics: Attach it at chest level, about 6-8 inches from your mouth. Too high, and you’ll catch every breath; too low, and it’ll sound distant.
Shotgun mics: Aim directly at your mouth just outside the camera frame. The closer, the better (without being in the shot).
Built-in phone mic: If you’re using your phone’s mic, record in a quiet space and speak directly into it. Avoid covering the mic with your hand or case.
Fixing background noise without expensive gear
Not everyone has access to a soundproof studio, but that doesn’t mean your audio has to suffer.
Try these simple (and free) fixes:
Film in a smaller room: Large, empty spaces create annoying echoes. Soft furnishings like rugs, curtains, and pillows help absorb sound.
Record under a blanket: Sounds weird, but it’s the cheapest DIY sound booth ever.
Turn off background noise: AC units, fans, and open windows can ruin your recording. If you can hear it, so can TikTok.
Use free noise reduction tools: Apps like Krisp or Adobe Enhance AI can magically remove unwanted noise.
How to sync audio and video perfectly (no more weird delays)
Nothing is worse than watching someone talk while their words are slightly off-sync. Here’s how to avoid it:
- Use a clap or snap at the start of your recording, creating a visual and audio cue that makes it easier to line up later.
- Manually adjust in editing apps like CapCut or Premiere Rush: Zoom in on the audio waveform and align it with lip movements.
- Check TikTok’s native sync feature if recording directly in the app. If things still look off, trim a few milliseconds from the start of your audio track.
Recording with music or voiceovers
Getting the timing right is key if your TikTok relies on music or voiceovers.
 Using TikTok’s built-in sounds? Always adjust the start point of your clip so movements or lip-syncs match the beat.
Recording a voiceover? Speak slightly slower than usual so you have room to adjust during editing.
Editing in an external app? Layer the audio first, then trim your clips to match, preventing awkward lags and keeping everything smooth.
The bottom line? Crisp audio makes your TikToks feel more polished and professional without detracting from your authentic vibe. Clear sound makes sure your message lands, whether you’re dropping wisdom, telling a story, or hyping up your latest project.
Frame it Like a Pro: Angles That Keep Viewers Hooked
Your phone might have a killer camera, but bad framing makes your TikToks look like amateur hour. The difference between “eh” and “whoa” is about angles, composition, and knowing how to work the frame. Let’s break it down.
The rule of thirds for framing
If you’ve ever wondered why some TikToks look effortlessly cinematic, chances are they follow the rule of thirds. Here’s the secret:
 Turn on your phone’s gridlines (found in camera settings).Position yourself or your subject along the intersecting lines instead of dead center.Leave space for movement: this makes shots feel more natural and dynamic.
This simple tweak instantly upgrades your framing, making your videos more polished and engaging.
Eye-line level vs. dramatic angles
Your camera angle does more than just capture your face — it sets the entire tone of your video.
 Eye-level (neutral, direct, and engaging)
- The go-to for storytelling, reactions, and tutorials.
- Makes viewers feel like you’re talking directly to them.
Slightly above eye level (flattering and casual)
- Perfect for selfie-style videos and talking-head content.
- Avoids the dreaded “up-the-nose” angle while keeping it natural.
Low-angle (powerful and dramatic)
- Great for fashion reveals, action shots, or that main character energy.
- Be careful — it can also make things look distorted if too extreme.
Dutch angle (for a chaotic or creative vibe)
- Tilt the camera slightly to add movement or tension.
- Used in trend edits, dance challenges, or surreal content.
Backlighting mistakes to avoid
 Light behind you = instant (spooky) silhouette.
- If your primary light source is behind you, your face will be dark and unreadable.
- Always have your light source in front of or beside you.
Use reflectors or white walls to bounce light back onto your face.
- If the lighting is too harsh, a sheer curtain or softbox can diffuse it.
Bonus trick: If filming outside, position yourself with the light slightly off to the side for a natural, balanced look.
Soft, even lighting tricks that make your skin glow without filters
If your skin looks too harsh, dull, or shiny, it’s not your skincare, it’s your lighting.
 Use a soft light source like a ring light or lamp with a diffuser to reduce harsh shadows.Avoid direct overhead lighting, which can create unflattering shadows under your eyes.Adjust your phone’s exposure manually — tap your face on the screen and slide up or down to tweak brightness.
Best practices for filming yourself vs. filming products
 Filming yourself?
- Keep the camera at eye level or slightly above for a natural look.
- Use hand gestures to add emphasis (without overdoing it).
Filming products?
- Use a clean, clutter-free background that highlights the item.
- Experiment with slow pans, close-ups, and overhead shots to add variety.
Your framing and angles should match the tone of your content. Whether telling a story, showing off an outfit, or filming a product demo, the right angles make your TikToks pop with no filter needed.
Filming Tricks That Make Editing Easier

Editing can make or break a TikTok, but the real magic happens before you even open your editing app. A little planning while filming can save hours in post-production and make your videos look effortlessly polished.
Let’s break it down.
Here’s how to prep your transitions like a pro
You know those seamless outfit changes and jaw-dropping jump cuts that feel like magic? Yeah, they didn’t happen by accident.
- Decide on the transition before you hit record: are you using a jump cut, a hand swipe, or a seamless match-on-action move?
- Use visual markers: a specific pose, head tilt, or hand motion makes it easier to align clips later.
- Match the beat: if your transition needs to hit a certain point in the music, film with the track playing in the background.
Pro tip: If you’re using a snap or hand swipe transition, record the last frame of the first clip and check it before filming the next one, keeping everything lined up for a perfect cut.
How to shoot multiple clips efficiently for seamless cuts
Stop wasting time refilming because your clips don’t match up. Here’s how to batch your filming like a pro:
 Keep your phone in the same position: use a tripod or mark your filming spot so your framing stays consistent.
Use consistent lighting: changing light (like filming at different times of day) can make clips look mismatched.
Record extra footage: always film a few seconds before and after your action so you have room to trim and adjust timing.
Pro tip: If you’re doing a multi-clip video, record all your takes in one session instead of stopping and returning later. This keeps everything looking cohesive.
These steps are a lifesaver if you struggle to line up two clips perfectly.
- Set a mark: Use a hand gesture, clap, or specific pose to mark where you want your cut.
- Sync with music: tapping your foot or nodding your head to the beat makes timing easier later.
- Edit in reverse: sometimes lining up the end of the clip first makes transitions smoother.
Pro tip: If you’re doing a talking video with cuts, keep your head and shoulders in the same position between takes so the edits don’t look jarring.
Matching your shots to TikTok trends (timing jump cuts to beats, etc.)
The best TikToks feel effortless, but they’re super intentional; especially when timing edits to music.
Film with the sound playing: help hit the right beats for cuts and transitions.
Use slow-mo to get precise timing: record in slow-mo, then speed it up in editing for perfect cuts.
Match the energy of the trend: snappy jump cuts work best for high-energy sounds, while smooth fades and cross-dissolves fit slower beats.
Pro tip: Some TikTok trends have specific timing cues (like clapping on a beat or zooming in on specific words). Watch examples before filming so your edit hits the mark.
Smart filming = effortless editing.
Plan ahead, use markers, and time your shots with trends in mind so your TikToks are clean, snappy, and scroll-stopping.
Your Setup is Your Superpower
Creating killer TikToks isn’t just about the ideas but how well you execute them. The right setup doesn’t have to be expensive or complicated, but a little planning and the right tools can take your content from “decent” to “scroll-stopping.”
You’ve got the knowledge, now it’s time to put it to work. TL;DR?
We’ve got you:
- Test your lighting and make sure your shots are crisp and clear.
- Stabilize your footage so your audience isn’t watching through shaky-cam chaos.
- Make your audio shine so every word is heard loud and clear.
- Use framing and angles to tell a better visual story.
- Plan your shots with editing in mind to make post-production a breeze.
The best TikTok creators aren’t just winging it, they’re using every tool at their disposal to ensure their content looks, sounds, and feels professional.
So what’s next? Pick ONE thing from this guide and upgrade your setup TODAY. Small changes add up quickly, whether it’s adjusting your lighting, testing a new mic, or just remembering to clean your camera lens (seriously, do it now).
Your TikTok glow-up starts with intention, not just inspiration. Now, go hit record and make some magic!
(And once that content starts going viral, we can help with the TikTok automation you’ll need to keep up with your new audience.)